Pretty Flowers - That Are Easy to Draw - with Muted Color Palette
If you are looking for an activity that is simple to draw and captures that vintage feel, this is the perfect option. While we usually use brighter colors here at Party in the Art Room, this project utilizes a much more muted color palette that gives a more elegant look. Based on Henri Rousseau’s Bouquet of Flowers, this project is great for beginners looking to create pretty flowers that are easy to draw. Here is how students can create their own Bouquet of Flowers.
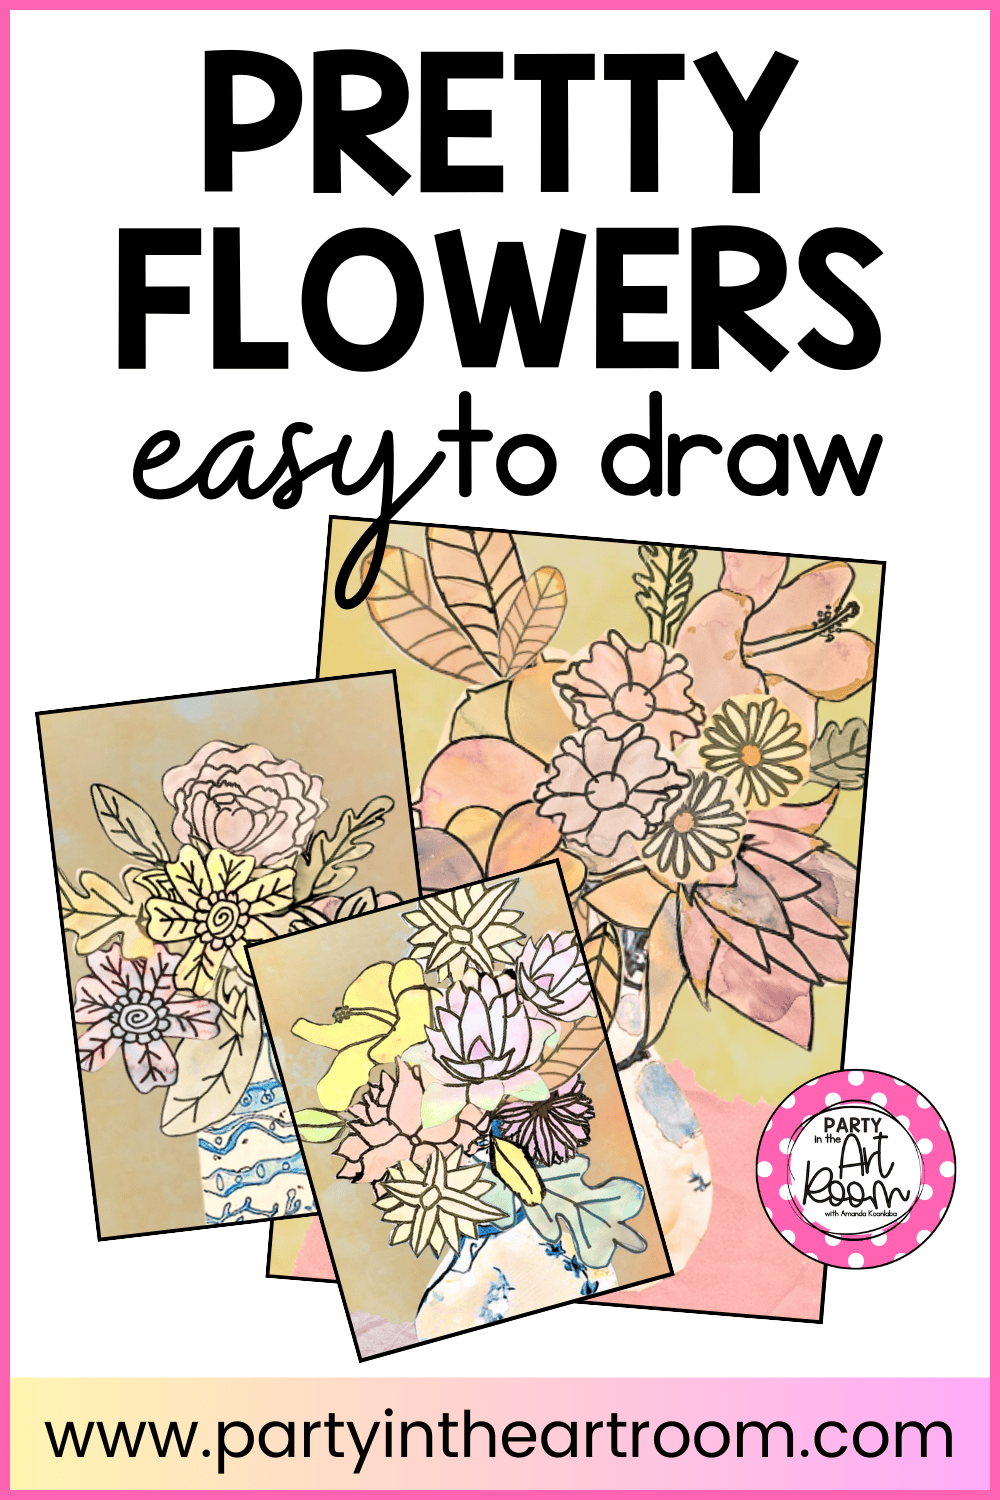
This cover photo showcases three elegant flower artworks drawn with a muted color palette inspired by Henri Rousseau.
Materials
● White Medium Weight Tagboard
● Salt
● Tempera Cakes
● Brewed Unsweet Tea
● Scissors
● Glue
Step 1 – Paint the Background
Students will start their project by painting the background. Students will paint a medium-weight white tagboard using orange, pink, and brown watercolors. These light pastel colors will help establish the vintage aesthetic for the rest of the painting.
Step 2 – Add Texture to Your Background
While the background is still wet with watercolors, instruct students to sprinkle salt around the paper to add texture to their artwork.
Step 3 – Draw Your Flowers
While the background is drying, students will begin drawing their flowers. Use directed drawing to have students begin drawing their flowers on a medium-weight white tagboard. Instruct students to draw 8 to 10 flowers in varying shapes and sizes to add variety to their bouquet.

A beautiful vase filled with watercolor and marker-drawn flowers exemplifies the timeless charm of the project.
Step 4 – Paint Your Flowers
After students have drawn their flowers it is time to add color. Students can use tempera cakes or watercolor paints to begin filling in their water with paint. Instruct students to use a lot of water in their paint to achieve a lighter and muted color palette. Encourage students to fill in all of their flowers while keeping the paint light on the paper.
Step 5 – Trace Your Flowers
Once students have painted in their flowers and the paint has dried, have students outline their flowers with a black permanent marker. This will make it easier for students to cut out while also providing definition to the edges of your flowers when they are added to the bouquet.
Step 6 – Dye Your Vase
Once the flowers are finished students can set them aside and begin working on their base. To add color to the vase, students will die white paper with brewed unsweetened tea. To get the muted color palette necessary for this project, have students lightly apply the brewed tea to their white paper to give a slightly dyed look. If students dip their entire paper into the tea, it may be too dark to match the aesthetic. Encourage students to leave some areas of the paper white so it looks more stained than painted.
Step 7 – Cut Out Your Flowers
While the tea-stained paper for the vase dries, students can begin cutting out their flowers. Have students cut flowers along the outside edge of the outline. Students should cut out the flowers individually so they can be arranged later.

An artistic close-up of a vase with delicate, muted flowers highlights the simplicity and elegance of the drawing.
Step 8 – Draw Your Vase
Once the tea-stained paper has dried, students can begin drawing the shape of their vase on the tea-stained paper. After creating the outline, students should add floral patterns around the vase to give it more detail.
Step 9 – Add Detail to Your Vase
After students draw their vases and floral designs, they can begin adding detail to their vases. Encourage students to use various shades of blue markers and colored pencils to add color to the details on the vase. Blue floral designs will match the vintage aesthetic and more accurately mimic the original artwork.
Step 10 – Cut out Your Vase and Arrange Your Bouquet
Now that all of the elements are designed, students can cut out their vase shapes and begin arranging their bouquets. Students should begin by cutting out their vase with a pair of scissors. Then students can lay out their vases and flowers on the background to begin planning their composition. Encourage students to try a variety of arrangements to see which they prefer. Remind students that, just like a real floral bouquet, the flowers will overlap each other and the vase. Once students have found the arrangement that they love, they can move on to the final step.

Another inspiring view of a vase with gracefully drawn flowers captures the vintage aesthetic of the project.
Step 11 – Glue Your Bouquet Together
Once your students have arranged their bouquets how they want them, they can start gluing everything down. Encourage students to glue their vases first and then add layers of flowers to create depth in their composition.
You Might Also Be Interested In:


Inside this free PDF, you'll find a treasure trove of van Gogh's self-portraits, each capturing the essence of the artist's unique style and introspection. From his early works to his later masterpieces, this collection showcases the evolution of van Gogh's self-representation throughout his remarkable career.
As students pair the self-portraits, they will develop visual recognition skills, explore color and brushstroke techniques, and gain a deeper understanding of van Gogh's artistic journey.

Check out discounts, deals, and recommendations on all our artsy faves!
Affiliate Disclosure: Party in the Art Room is supported by its audience. When you purchase through links on this site, a commission may be earned.
Get to know Amanda Koonlaba!
Hi! I’m Amanda. Teaching children to be creative thinkers is my greatest joy. I’m here to help you bring that same joy to your classroom.

This guide is packed with 25 ideas for using art to teach math and ELA. It’s arts integration for the win!

I want all students to feel successful in the art room, so I created a standards-based Daffodil Collage lesson to do just that! The lesson includes an artist study, student reflection, and more, so push your artists to their full potential.