5 Amazing Artwork Bulletin Board Ideas for Elementary
Bulletin boards are a great way for elementary students to create larger art installations that everyone can see and participate in. Bulletin boards allow students to create on a larger scale while beautifying the classroom or hallway. Students can grow their confidence by creating art that everyone can enjoy. Here are some amazing art projects that you can use with elementary students to beautify the bulletin board ideas in your classroom and school.
Metal Board and Magnets
A metal board with magnets is a great way to display student art, especially when you have a lot of projects to rotate through or are changing what is displayed frequently. First, ask your school if you can get a piece of magnetic metal board to put up on the wall. Some schools may be able to provide a sheet of metal flashing that can be used as a magnet board.
If your school is unable to get you what you need, you can purchase a magnetic board or find your own metal flashing at a hardware store. Metal sheeting or flashing can be heavy, so it is always best to get approval before hanging it on the wall.
Once you get your metal board up, you can use magnet sheets to cut your magnets to size. Magnets can be easily attached to the back of student artwork or can be used to pin the projects to the board.
This wood panel painting project is a great way to use a metal display board. Simply attach magnets to the back of each student’s wood panel and they can be easily displayed on the wall. The magnets make it easy to shift around student work on the board. You can have students move around their projects on the board to create an ever-changing piece of collaborative artwork. Seeing their own artwork in a new place each day can teach kids perspective while they learn that their art has value.
Create an Art Mobile
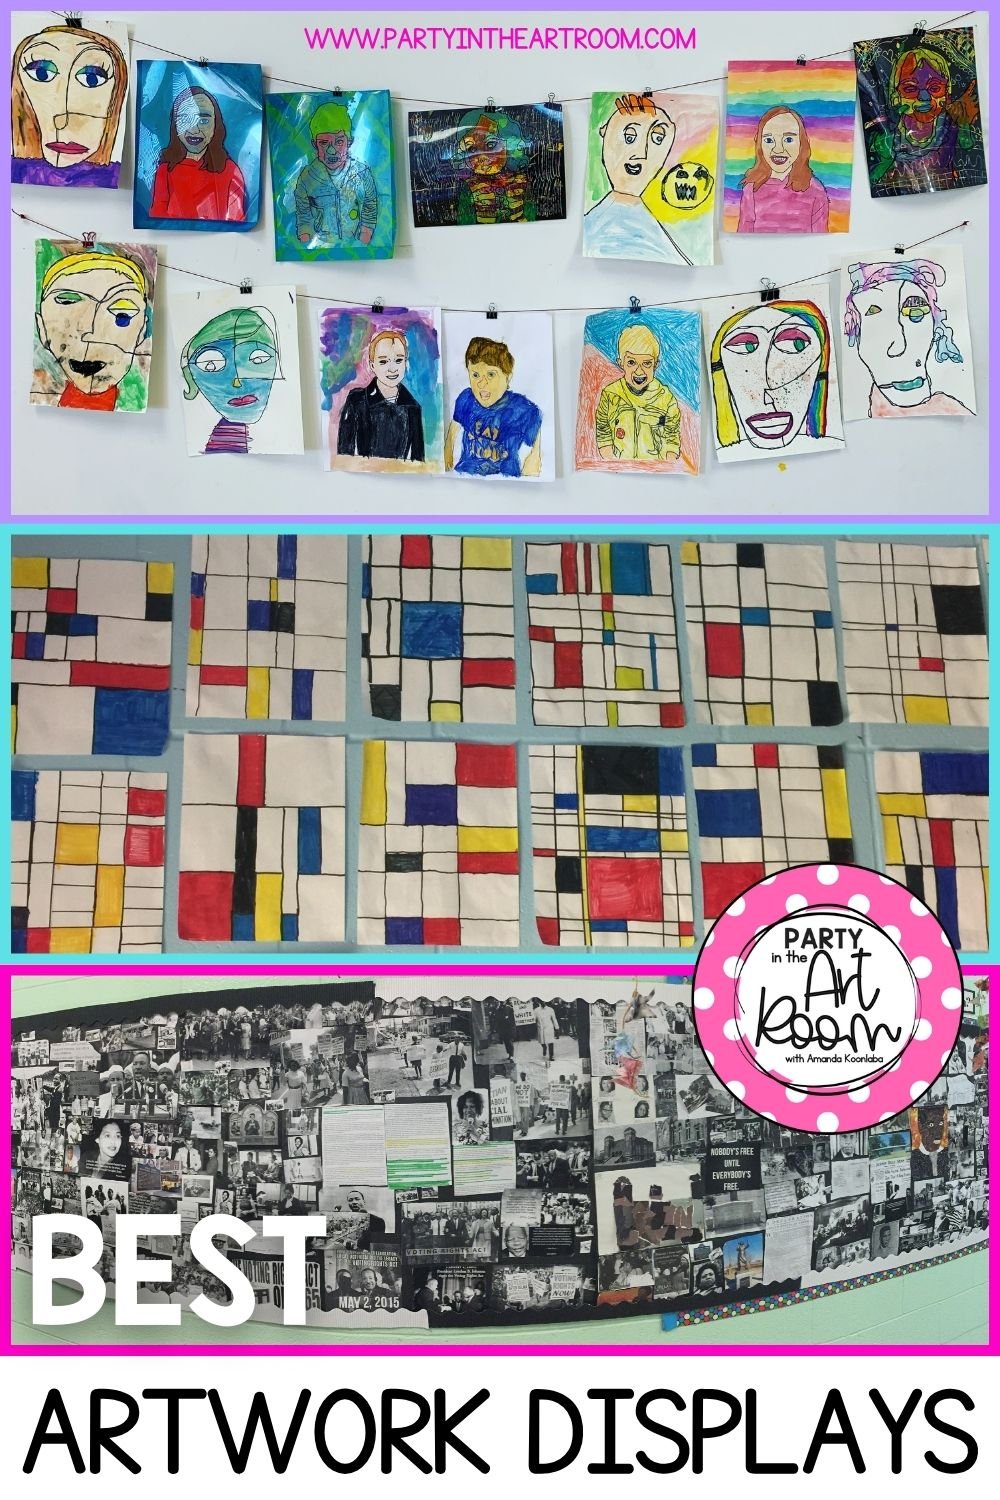
While mobiles are mostly used above a crib, they also serve as a dynamic and fun way to display student art in place of a bulletin board. Art mobiles are a great option when wall space is limited or you are looking to draw more attention to a display that moves and spins. This type of art display is best for small pieces of art. Here’s what you will need to make your own art mobile display:
· Bamboo sticks
· Ribbon
· Rubber bands
· Small Binder Clips
Start by bundling a few bamboo sticks together and securing them with a rubber band. After you have your bundle, tie on three to four pieces of ribbon around two feet in length. Use the remainder of your bamboo sticks and rubber bands to create the bottom cross-section of the mobile. Tie the loose ends of your ribbon to the second bundle of bamboo sticks. Tie three or four more pieces of ribbon around two feet long onto the second bundle. Use another piece of ribbon on the top of the first bundle to hang it onto the wall.
Once you have created and hung your art display mobile, it is time to start adding pieces of art to the display. Use the small binder clips to attach small pieces of art to the ribbon hanging from each bundle. Fill up all of the hanging ribbon with pieces of art to create a finished and full display. You can reuse your mobile by just switching out the pieces of art when need be.
Keep it Simple with Tape.
A bulletin board doesn't have to be complicated to be an exciting display of student artwork. You can display tons of student art in a captivating way by using just a roll of tape. Painter’s tape is a good option for keeping painted walls from damaging. Mavalus tape is even stronger than painters’ tape and adheres to walls without ruining the paint. Mavalus tape is ideal for cinderblock or brick walls. It is slightly more expensive than painter’s tape, but it will last much longer and is much more versatile when it comes to sticking to multiple textured surfaces.
Taping projects to the wall gives you the ultimate freedom when it comes to displaying student artwork. With tape, you can use an entire wall or any other open space around your classroom. Tape is easy to use and doesn't require any additional time and materials to construct. Your students will be so excited to see their artwork all over your classroom that they won't even notice what's holding them up.
Out of the other options on this list, tape is the most accessible and versatile. The most important part of a bulletin board display of student work is it students get to see their work displayed for everyone to see. This shows students that their work is valued. Building the confidence of young artists is the most important part of art education. Displaying student artwork with tape makes that part of the job easy in any circumstance or classroom.
Twine, Clips, And Pushpins
You can use a combination of twine, clips, and push pins to get the most out of your bulletin board space. Whether you are using a traditional bulletin board and want to maximize the number of projects you can display or you want an interesting and exciting way to display student artwork on a wall, this technique may work for you.
Start by cutting pieces of twine to your desired length. Somewhere around four to five feet may be the best option. This length will allow you to display around 4-8 pieces of art without being too heavy for the pushpins to hold. Once you have decided how long you want your twine to be, tie a push pin to each end of your twine.
Now that your twine is ready to be hung find a place in the classroom where you have drywall that the push pin can penetrate. Is important to place this display out of reach of your students because it will be easy to pull down off the wall. Displaying artwork up high is a great way to keep your display piece safe while making all of the wonderful art easy to see around the classroom.
Once you've chosen your spot push each pushpin into the wall leaving a small amount of slack in the twine. If you are unable to push the push pin into the drywall with your hands, you may need a few light taps from a hammer to get the push pin into the drywall. If you do not feel comfortable putting holes in the drywall of your classroom you can also use this technique with magnets on a blackboard, whiteboard, or metal display board.
Once you have hung your twine and push pins in the desired location you can begin clipping on art with small binder clips. One of the benefits of this method of displaying student artwork is that it is easy to interchange pieces when you see fit. Consider hanging up twine around the entire exterior wall of your classroom to create an immersive student art display.
Create a Collage
Turn your classroom art displays into a collaborative art project by creating a collage of student work. Instead of taping individual work around the room, have students put together a collage composition that features all of their work in one place.
With the collage, you can overlap different works to create a new piece of collaborative art. Depending on the projects being displayed students can cut and paste parts of their projects on the greater classroom display. While this may not be ideal for all projects or all students, it is a great option for students to practice composition while taking pride in the art they have already created.
The collage can also feature artist statements from each student showcasing their thought process and research behind their piece. You can take the collage to the next step by including student notes, rough drafts, vocabulary words, and sentence strips in the greater collage. Not only will this display the finished student artwork, but it will also serve as a reflection of the process of creating and making the project being displayed. A collage is a fun and creative way to make the learning process visually beautiful.
While a collage can be used to display any art piece created by students, you can take it to the next level by following a color scheme from the very beginning. If you have a project where all students are working in a singular color or in grayscale the final collage will look like it is meant to be instead of a random conglomeration of student work.
Classroom collages promote collaboration and creativity while instilling confidence in all of the young artists in your classroom. Not only is their individual art being displayed in the classroom, but now they are part of a beautiful and collaborative piece of classroom art.
You might also like:
Get your copy of the free Social Emotional Skills with Vincent van Gogh resource.
Affiliate Disclosure: Party in the Art Room is supported by its audience. When you purchase through links on this site, a commission may be earned.Hi! I’m Amanda. Teaching children to be creative thinkers is my greatest joy. I’m here to help you bring that same joy to your classroom.
This guide is packed with 25 ideas for using art to teach math and ELA. It’s arts integration for the win!
I want all students to feel successful in the art room, so I created a standards-based Daffodil Collage lesson to do just that! The lesson includes an artist study, student reflection, and more, so push your artists to their full potential.

